ซึ่งเป็นแบบ Open Source ซึ่งไม่มีค่าใช้จ่าย ในการติดตั้ง และใช้งาน
ส่วนรายละเอียดอื่นๆสามารถดูได้ที่เว็บไซต์นี้ http://www.zabbix.com/
วันนี้เรามาดูการติดตั้ง Zabbix บน CentOS7 กัน ครับ
ก่อนติดตั้ง ควร Update CentOS7 ก่อน ด้วยคำสั่ง
[root@zabbix ~]# yum -y update
[root@zabbix ~]# reboot
ขั้นตอนที่.1 เปิดฟังก์ชั่น EPEL และ Zabbix Reposity ด้วยคำสั่งนี้
[root@zabbix ~]# yum install epel-release
[root@zabbix ~]# rpm -ivh http://repo.zabbix.com/zabbix/3.2/rhel/7/x86_64/zabbix-release-3.2-1.el7.noarch.rpm
ขั้นตอนที่.2 ติดตั้งฐานข้อมูล และ Zabbix Server และ Packet Web
[root@zabbix ~]# yum -y install zabbix-server-mysql zabbix-web-mysql mysql mariadb-server httpd php
ขั้นตอนที่.3 ตั้งค่า ฐานข้อมูล
[root@zabbix ~]# systemctl start mariadb
[root@zabbix ~]# systemctl enable mariadb
ln -s '/usr/lib/systemd/system/mariadb.service' '/etc/systemd/system/multi-user.target.wants/mariadb.service'
[root@zabbix ~]# mysql_secure_installation


ขั้นตอนที่.4 เข้าระบบฐานข้อมูล และ สร้าง User และ สร้างฐานข้อมูล
เข้าสู่ระบบฐานข้อมูล[root@zabbix ~]# mysql -u root -p
Enter password:
เริ่มสร้างฐานข้อมูล
MariaDB [(none)]> create database zabbix_db;
Query OK, 1 row affected (0.00 sec)

สร้าง User สำหรับใช้งานฐานข้อมูล และ ให้สิทธิ์
MariaDB [(none)]> grant all privileges on zabbix_db.* to zabbix_user@localhost identified by 'รหัสผ่านของ User';
Query OK, 0 rows affected (0.00 sec)
MariaDB [(none)]> flush privileges;
Query OK, 0 rows affected (0.00 sec)
MariaDB [(none)]> exit

ขั้นตอนที่.5 นำเข้าข้อมูล สู่ฐานข้อมูล
[root@zabbix ~]#cd /usr/share/doc/zabbix-server-mysql-3.2.3
[root@zabbix zabbix-server-mysql-3.2.3]# gunzip create.sql.gz
ใส่ รหัสผ่านของ Root Database
[root@zabbix zabbix-server-mysql-3.2.3]# mysql -u root -p zabbix_db < create.sql
Enter password:ขั้นตอนที่.6 ตั้งค่า บน Zabbix Server
ให้ ไปที่
[root@zabbix ~]#cd /etc/zabbix/
[root@zabbix ~]#vi zabbix_server.conf
...................................
DBHost=localhost
DBName=ชื่อฐานข้อมูล
DBUser=ชื่อUserของฐานข้อมูล
DBPassword=รหัสผ่าน
...................................
หลังจากนั้น ให้ บันทึกและปิด
ขั้นตอนที่.7 แก้ไขค่าใน PHP ที่ /etc/php.ini
แล้วปรับให้เหมือนด้านล่าง
[root@zabbix ~]# vi /etc/php.ini
................................
max_execution_time = 600
max_input_time = 600
memory_limit = 256M
post_max_size = 32M
upload_max_filesize = 16M
date.timezone = Asia/Bangkok
...............................
ขั้นตอนที.8 เปิดให้ Firewallอนุญาติ โดยการเปิด Port
[root@zabbix ~]# firewall-cmd --permanent --add-port=10050/tcp
success
[root@zabbix ~]# firewall-cmd --permanent --add-port=10051/tcp
success
[root@zabbix ~]# firewall-cmd --permanent --add-port=80/tcp
success
[root@zabbix ~]# firewall-cmd --reload
success
[root@zabbix ~]# systemctl restart firewalld
ขั้นตอนที่.9 สร้างกฏใน SeLinux
[root@zabbix ~]# setsebool -P httpd_can_connect_zabbix=1
[root@zabbix ~]# setsebool -P zabbix_can_network=1
[root@zabbix ~]#reboot
วิธีเช็คว่า zabbix_can_network เปิดหรือยัง ใช้คำสั่งนี้
[root@zabbix ~]# getsebool -a | grep zabbix
ขั้นตอนที่.10 Start Service Zabbix and HTTP service
[root@zabbix ~]# systemctl start zabbix-server
[root@zabbix ~]# systemctl enable zabbix-server
ln -s '/usr/lib/systemd/system/zabbix-server.service' '/etc/systemd/system/multi-user.target.wants/zabbix-server.service'
[root@zabbix ~]#
[root@zabbix ~]# systemctl start httpd
[root@zabbix ~]# systemctl enable httpd
ln -s '/usr/lib/systemd/system/httpd.service' '/etc/systemd/system/multi-user.target.wants/httpd.service'
[root@zabbix ~]#
ขั้นตอนที่ 11 เริ่มติดตั้ง Zabbix
ให้เข้าไปที่ http://ตามด้วย IP Zabbix /zabbix

Next

Next

Add User Password Database
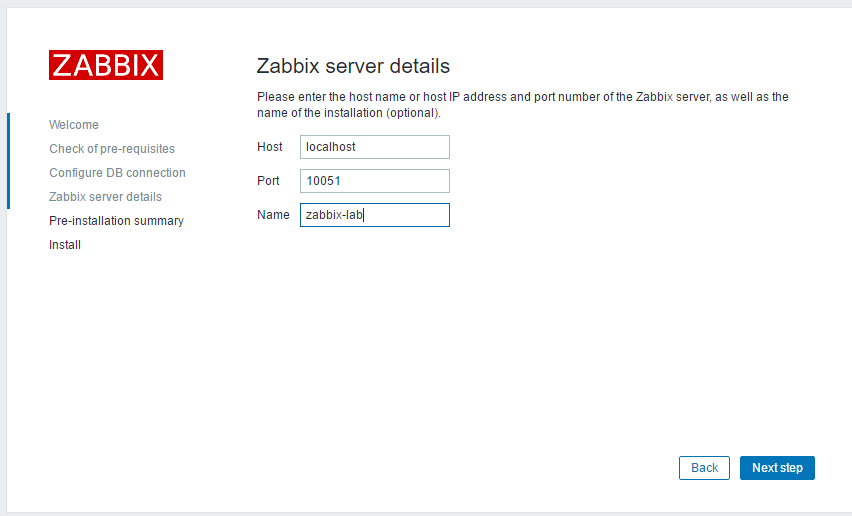
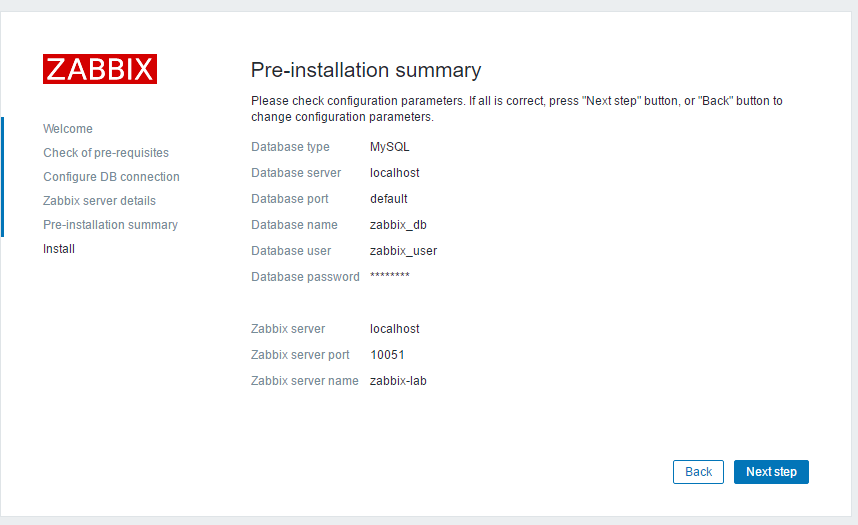
รายละเอียด ของการตั้งค่า

การติดตั้ง เสร็จสมบูรณ์ สามารถกด Finish เพื่อเข้าสู่ระบบครั้งแรก

เข้าระบบ ครั้งแรก User & Password ครั้งแรก
User : Admin
Password : zabbix

หน้าตา Zabbix Server
Memo: หากมีข้อความ Error : zabbix server is not running the information displayed may not be current

แก้ไข โดยทำการปิด Selinux
วิธีดังนี้
[root@zabbix ~]#vi /etc/sysconfig/selinux
แก้ไขตรง “SELINUX=enforcing” to “SELINUX=disabled” หลังจากนั้น ให้ บันทึกแล้ว Restart เครื่อง1 ครั้ง

E-Mail : Abdulloh.eg@gmail.com
Line : Muslimeen


ไม่มีความคิดเห็น:
แสดงความคิดเห็น